Hello guys! In today’s tutorial, I’m going to show you how to transform a simple video into a professional-looking, iPhone-style video using the CapCut video editing app. If you’re serious about making content for YouTube, Instagram, or any social media platform, video quality matters — and this guide will help you stand out. So stick around till the end!
Why Color Grading Matters
When you’re uploading content, especially on platforms like YouTube or Instagram, your video quality plays a huge role in attracting views and followers. A dull, unedited video often gets ignored, but if you add iPhone-style color grading, you’re likely to see a significant increase in engagement.
What You’ll Need
- CapCut App (Free on Android and iOS)
- A VPN app (such as SuperVPN) to unlock region-restricted features if needed
Step-by-Step Guide to Achieving the iPhone Look
- Open the CapCut app and tap New Project.
- Select the video you want to edit and import it into the timeline.
- Tap on the video clip and scroll to find the Filter option.
- Try various filters like Orange & Blue or Cinematic Green until you find the one that enhances your video the best.
- Adjust filter intensity to make the effect more subtle and realistic.
Fine-Tune with the Adjust Tools
Click on the Adjust tab and modify the following settings for a pro-grade finish:
- Brightness: Slightly increase to make the video more vibrant.
- Brilliance: Decrease to maintain smooth light transitions, mimicking iPhone aesthetics.
- Highlights: Lower to reduce harsh lighting and create a soft look.
- Shadows: Increase slightly to balance out dark areas.
- White & Black Levels: Adjust for clarity and detail.
Color Customization with HSL
CapCut also allows you to fine-tune individual colors using the HSL (Hue, Saturation, Lightness) settings:
- Modify green, yellow, and orange hues to make nature shots or skin tones more appealing.
- Use saturation and brightness to bring your colors to life.
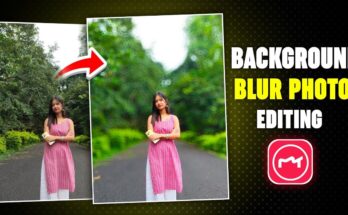
Apply Professional Blur Effects
To make your video feel like it was shot on a DSLR, go to:
- Tap Effects > Video Effects > Lens section.
- Apply the Spot Blur effect, which mimics a DSLR’s depth-of-field by blurring only the background.
Final Touches for a Polished Look
- Use Sharpen and Clarity to improve video resolution.
- Enhance facial features with Face Retouch: whitening and smoothing options are available under Retouch > Face.
- Adjust Temperature and Hue to fine-tune the video’s mood (cool blue vs. warm yellow).
Export Your Video
Once you’re satisfied with the results, tap the export button, select the maximum resolution available, and your video will be saved to your device, ready to be uploaded.
Conclusion
And that’s it! In just a few easy steps, you can turn any average video into a professional masterpiece with an iPhone-style aesthetic using CapCut. Whether you’re growing a YouTube channel, Instagram page, or simply enhancing your personal video content, these techniques will help you level up instantly.
If you found this guide helpful, make sure to check out other tools like Adobe Premiere Rush or LumaFusion for even more editing control.
Until next time — stay creative and keep sharing happiness!