Hey guys, what’s up? In today’s post, I’ll walk you through how to blur your photo background like a DSLR using a completely free mobile app called M2. Yes, you heard that right! No need for Photoshop, high-end cameras, or paid subscriptions. You can do this all using your smartphone.
This method is easy, fast, and delivers professional-level results. So stick around till the end to get every step and make your photos look cinematic.
Why Blur Backgrounds Like DSLR?
Blurring your photo’s background — also known as creating a bokeh effect — makes your subject stand out and gives your photos a more professional look. Usually, you’d need a DSLR camera with a wide aperture lens to achieve this. But with apps like M2, even smartphone photos can have that dreamy depth-of-field effect.
Step-by-Step Guide to Blur Photo Background Using M2 App
-
Download the M2 App
First, go to your Google Play Store and search for “M2 Photo Editor”. You can download it directly from here. Once it shows up, tap install and wait for it to finish.
-
Open the App and Select Photo Mode
After installing, open the app. You’ll be greeted with multiple options like video retouching and photo editing. Tap on the “Photo” section to begin editing a picture.
-
Choose the Photo You Want to Edit
Pick any photo from your gallery — preferably one where the subject and background have some contrast. For example, a portrait where you want the person to pop out more.
-
Find and Apply the Blur Effect
Scroll down through the editing options and find the “Blur” tool. Tap it, and the app will automatically detect your photo background and blur it.
You will see two main options:
- Classic Blur: A smooth blur effect that works on most photos.
- DOF (Depth of Field): Mimics DSLR-style focus, keeping the subject sharp while the background gradually blurs.
Choose the one that looks best for your image.
-
Customize the Blur Intensity
After selecting the blur style, you can adjust the intensity. Higher intensity will give you more blur, ideal for portrait-style shots. Use the slider to control how strong or soft the blur effect is.
-
Try Different Blur Styles
The M2 app also includes creative blur effects like motion blur, spin blur, and radial blur. You can test these for a more artistic touch.
-
Enhance Colors and Lighting
Once the background blur is done, you can make your photo even better by adjusting brightness, saturation, contrast, and skin tone. Head over to the “Adjust” section to play around with:
- Saturation: Boost colors for a vibrant photo
- Warmth: Control color temperature
- Skin Tone: Smooth and brighten skin easily
- Light & Shadows: Add glow or contrast
-
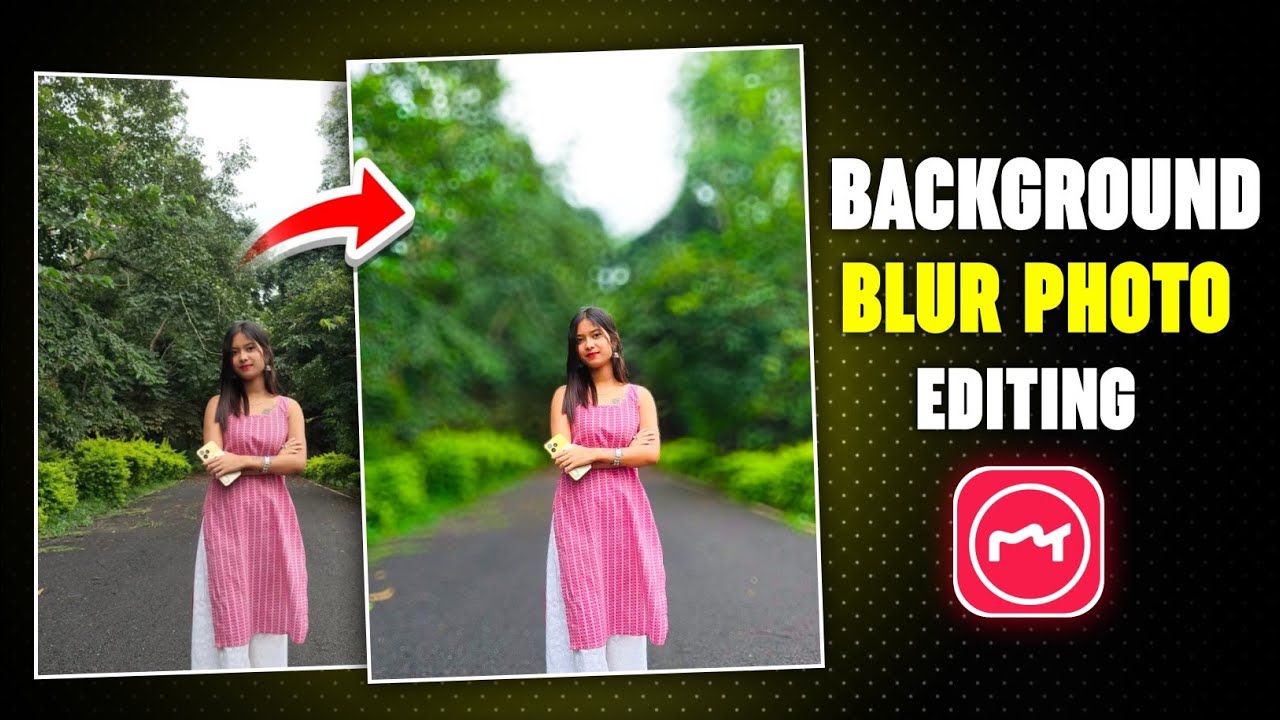
Before vs. After Comparison
The app allows you to compare your edited photo with the original one. You’ll instantly notice the DSLR-like blur and enhanced colors — all done with a few taps!
-
Save the Final Image
To save, simply tap the three-dot menu and choose “Quick Save”. Your image will be saved to your device gallery. Note: Since the app is free, occasional ads may appear. Just skip them.
Best Free Alternatives to M2 App
If you want more options for photo editing, here are a few other tools you can explore:
- Remove.bg – Automatically removes background from images
- Fotor Blur Tool – Online editor for background blur
- Canva Photo Editor – Blur tool included in photo filters
- PicsArt – Offers blur and retouch features with a user-friendly interface
Final Thoughts
And there you have it! That’s how you can easily blur your photo background just like a DSLR using the free M2 app. This is a great trick for improving Instagram selfies, thumbnails for YouTube, or even creating professional-looking profile pictures — all from your mobile phone.
Whether you’re a content creator, influencer, or someone who just wants to up their photo game — this technique is a must-try. Plus, it’s 100% beginner-friendly and completely free.
If you found this tutorial helpful, share it with your friends and check out our other guides on photo editing tricks and AI image tools.
Until next time — stay creative and keep editing!