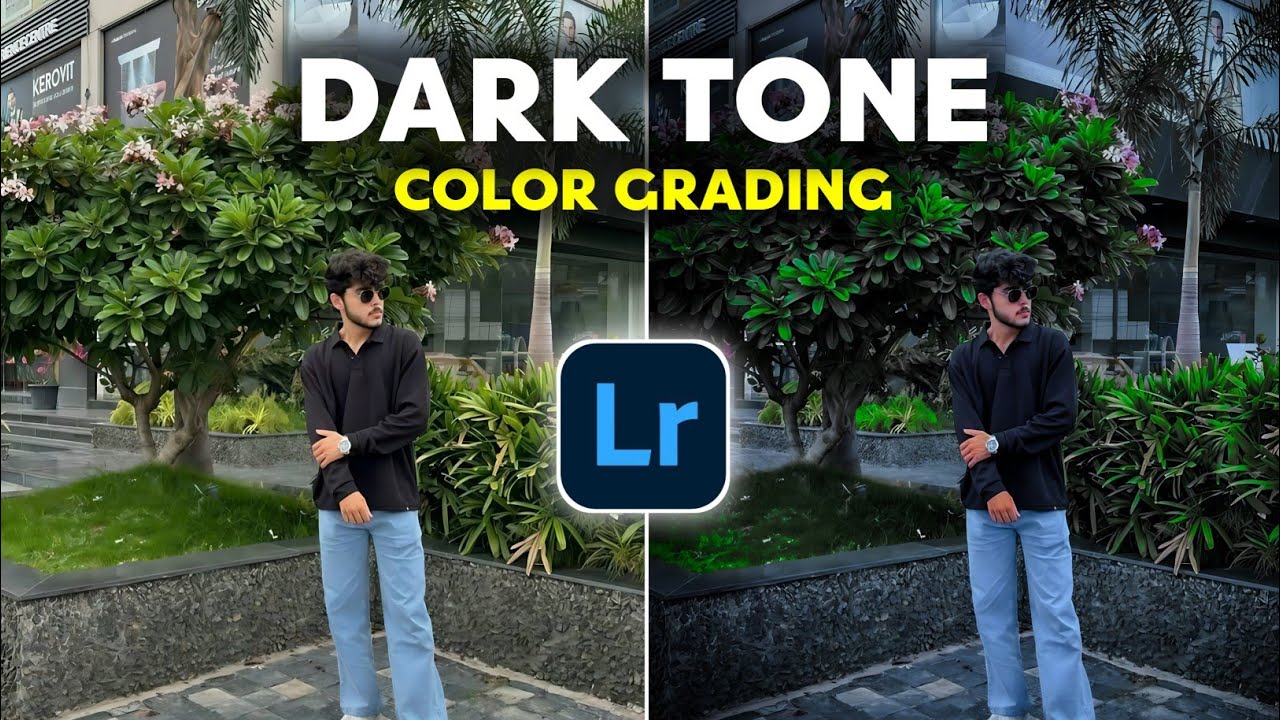
Welcome, creators! If you’ve ever wondered how to achieve that viral dark tone color grading look in your photos using just your smartphone, you’re in the right place.
In today’s tutorial, we’ll walk you through step-by-step photo editing using Adobe Lightroom Mobile — no presets, no paid filters, just pure manual color grading. This method will help your photos look cinematic, professional, and Instagram-worthy.
About Lightroom Mobile
Adobe Lightroom Mobile is a free photo editing app available on the Google Play Store and Apple App Store. It offers powerful editing tools like exposure control, color grading, masking, and presets. Ideal for both beginners and professionals, this app allows you to turn ordinary photos into visually stunning masterpieces.
Step 1: Download and Open Lightroom
- If you haven’t already, download Lightroom Mobile.
- Open the app and import the photo you want to edit.
Step 2: Basic Light Adjustment
Tap on the “Edit” tab and go to the “Light” section. Here’s how you can manually adjust it:
- Increase or decrease the Exposure based on your photo.
- Reduce the Shadows and Blacks to shift tones into a darker look.
- Enable the HDR feature for richer details.
This will begin the transition of your photo into a moody dark tone aesthetic.
Step 3: Use Tone Curves
Navigate to the “Curves” section. Create a subtle ‘S’ curve or manually pull down points on the curve to deepen the shadows and slightly lift the highlights. This adds depth and contrast to your image.
Step 4: Color Adjustments
Go to the “Color” tab and make the following adjustments:
- Adjust Temperature and Tint to match the mood you want.
- Reduce Saturation and Luminance of less important colors.
- Use the “Mix” tool to individually control colors like red, orange, blue, etc.
This will give your photo a cleaner and more focused dark theme.
Step 5: Masking for Highlighted Colors
Tap on “Masking” and select “Color Range”. Choose a single vibrant color like green from your photo.
- Refine the selection as needed.
- Increase saturation or shift the hue slightly to make this color stand out against the dark background.
This technique helps keep one part of your photo vivid while the rest remains in dark tones, making it more visually appealing.
Step 6: Final Retouch and Blur
For the finishing touch, go back to the “Edit” tab and do the following:
- Re-adjust saturation and colors if needed.
- Apply slight Blur for background softness. (Optional)
- Experiment with Vignette to further darken edges and highlight your subject.
Before and After
One of the best features of Lightroom is its ability to preview edits. Tap and hold the image to view the original. You’ll clearly see the dramatic transformation from a basic photo to a dark cinematic look.
Save and Export
- Click the “Share” button.
- Select “Save to Device” or export it directly to Instagram or other platforms.
Pro Tips:
- Always edit in moderation—too much saturation or contrast can ruin the vibe.
- Experiment with Lightroom Premium tools if you want to unlock professional features like healing, masking with AI, etc.
- Follow creators on Instagram #LightroomEditing to get more inspiration.
Conclusion
That’s it! With just a few thoughtful adjustments in Lightroom Mobile, you can completely transform your photos into something cinematic and share-worthy. Whether you’re a social media influencer, a photography hobbyist, or just someone who loves dark-themed edits, this workflow will take your visuals to the next level.
Found this helpful? Let us know in the comments or share your results using the hashtag #DarkToneEditing. Don’t forget to check out LightroomTutorials.com for more in-depth tips and downloadable presets.