Hello guys! Hope you’re all doing great. In today’s video tutorial, I’ll show you how to design a polished, professional-looking DP (display picture) or logo using just the PicsArt app. No complicated tools—just simple steps inside PicsArt. Follow along till the end, and let’s start!
Why Use PicsArt for Creating a Logo or DP?
PicsArt is a user‑friendly, powerful mobile design app ideal for creating logos or custom DPs. It offers:
- A clean canvas with customizable shapes
- Easy background removal and layering
- Text tools, fonts, shadows, gradients
- Export in square format (1:1), perfect for profile picture use
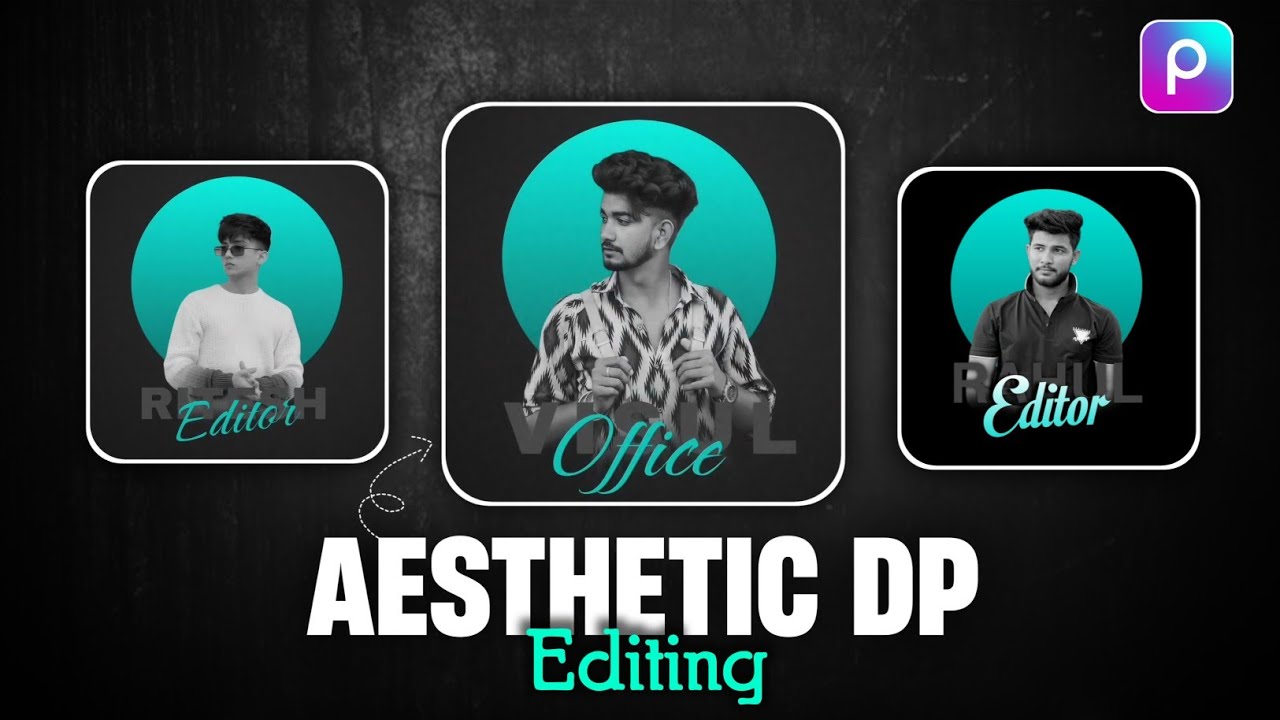
This tutorial uses black circle backgrounds, transparent photo overlays, bold name text, and creative edits—all inside the free version of PicsArt.
Step 1: Install and Launch PicsArt
- PicsArt – Photo & Video Editor (Android)
- PicsArt is also available on App Store for iOS.
Open the app, tap the “+” icon, then choose Edit a Photo to begin.
Step 2: Add a Black Circle Background
- Tap on the background area to open the shape gallery.
- Select a solid black circle—this becomes your logo base and is already 1:1 aspect ratio, so no resizing needed.
This clean, circular canvas ensures your logo or DP looks perfect on social profiles.
Step 3: Insert and Adjust Your Photo Overlay
- Tap the “+” icon → “Add Photo,” and select the PNG image you want in the logo (link provided in the video description).
- Resize and position the image above the circle—slide it slightly upward to make space for text at the bottom.
- If needed, tap “Remove BG” to eliminate the original background from the image.
The result is a circular background with your face or graphic floating in the center.
Step 4: Convert the Image to Black & White (Optional Style)
To give your logo a classic, elegant touch:
- Scroll to the Adjust tab.
- Reduce Saturation fully to –100 to make it monochrome.
- Optionally adjust Brightness to tone down harsh lighting.
This gives a subtle, refined look if you want a minimal or monochrome aesthetic.
Step 5: Add Your Name or Title Using Text
- Tap “+” → Text → “Add Text” and type your name (use all caps for a strong look).
- Choose a bold or calligraphic font from the built-in gallery—or import your custom font via “Import Font.”
- Position the text below your face or graphic.
This step personalizes the image and turns it into a branded profile picture or logo.
Step 6: Apply Gradient Color & Shadow for Visual Depth
- Go to the Text layer → Color → select a **gradient** (e.g., black shade gradient).
- Tap Shadow: set opacity high, position offset zero, and blur radius to 20–25 to subtly lift the text off the background.
This layering gives your name a polished, professional feel against the photo and background.
Step 7: Add a Title or Description Under Your Name
If you want a title such as “EDITOR” or “CEO”:
- Tap “Text” again and type your role in uppercase.
- Use a matching font—search “calligraphy” or “modern script” for sleek styling.
- Apply gradient color and shadow just like you did with your name.
- Position it beneath your name, centered.
Step 8: Fine-Tune Layout & Final Design
Make small position or size tweaks to ensure:
- Your photo and name are centered within the circle.
- Text elements have consistent spacing and alignment.
- Layer order is correct—photo overlapped on circle, text on top.
If something mispositions, use the “undo” button to revert and adjust.
Step 9: Add Creative Extras (Optional)
For more visual flair:
- Add slight shadow behind the photo layer for a subtle floating effect.
- Color the shadow layer with a tint that matches your brand tone.
- Rotate or scale elements slightly for artistic look, but keep everything balanced inside the circle.
Step 10: Export Your Logo / DP in High Quality
- Tap Done and then the Download button.
- Choose PNG or JPG at max resolution (square output).
- The file will save to your device—ready to upload as a profile picture or use in branding.
Why This Design Is Professional & Effective
- A clean circular layout keeps the focus on your face or symbol.
- Black-and-white style looks timeless and versatile.
- Bold, uppercase name and role give brand identity.
- Subtle shadow and gradient add depth and polish.
External Resources & Download Links
- Download PicsArt (Android)
- PicsArt is also available on iOS App Store.
- Free PNG circle templates: CleanPNG Circle Shapes
- Downloaded calligraphy fonts: Google Fonts – Display & Script
Pro Tips & Variations
- Use a colored circle instead of black for brand consistency (e.g., blue or gradient).
- Try different font styles—minimal sans-serif, serif, or script depending on your niche.
- Experiment with partial face cropping inside the circle for a modern profile look.
- Add small icons (camera, pen, briefcase) behind your name to indicate profession.
Conclusion
And that’s it! You’ve now learned how to make a professional display picture or logo using PicsArt in just a few simple steps. From a clean circular canvas to overlaying an image, adding stylish text, gradients, and exports—it all comes together inside the app. Follow this workflow, and you’ll have a branded profile image ready to use on social media or personal branding sites.
Want more creative tutorials with free tools like Canva, Snapseed, or CapCut graphic design? Let me know in the comments. Until next time, stay creative and keep spreading positivity 😊